Our bedroom is where we took the first leap into this crazy renovation journey! It has probably required the most Pinterest searches and honestly had us the least excited at times. But, we are so happy how it all came together even if it gave us the biggest renovators block. (That’s a thing right? Like writer’s block? Let’s just choose to humor me here.)

Day One:
Our RV was delivered by the dealership we bought it from to the place where we were planning on living for a while. Win - Win, Right? Well, kinda. The process was awesome all up until the parking.

We had prepped and measured the lot we were moving to and were very confident (read overly confident) in our plan. As I was standing outside, watching the RV be parked, I heard something that sounded a lot like nails on a chalkboard then the unmissable sound of glass shattering. Yup. 45 minutes into RV ownership, and we already broke it. A branch meant our bedroom window was toast, and we earned some cool skid marks on the front half of the RV. The dealership was AWESOME and had a new window to us by the end of the day and even did the install. After that, we were ready to start breaking more things with demo!

Peep the window screen busted out of it's place. Glad that was the one thing that made it out safely...
Getting Going:
First up was removing the old the carpet where we learned that our RV was made by first wrapping the carpet around the floor and then under the walls before they were attached. Basically that’s a confusing way to say that tearing up the carpet wasn’t fun. At all.

FIRST piece of carpet torn up! It was super satisfying for about the first 15 minutes.
From there we painted EVERYTHING. We opted to use the same color for the cabinets and walls to try and open the space as much as possible.
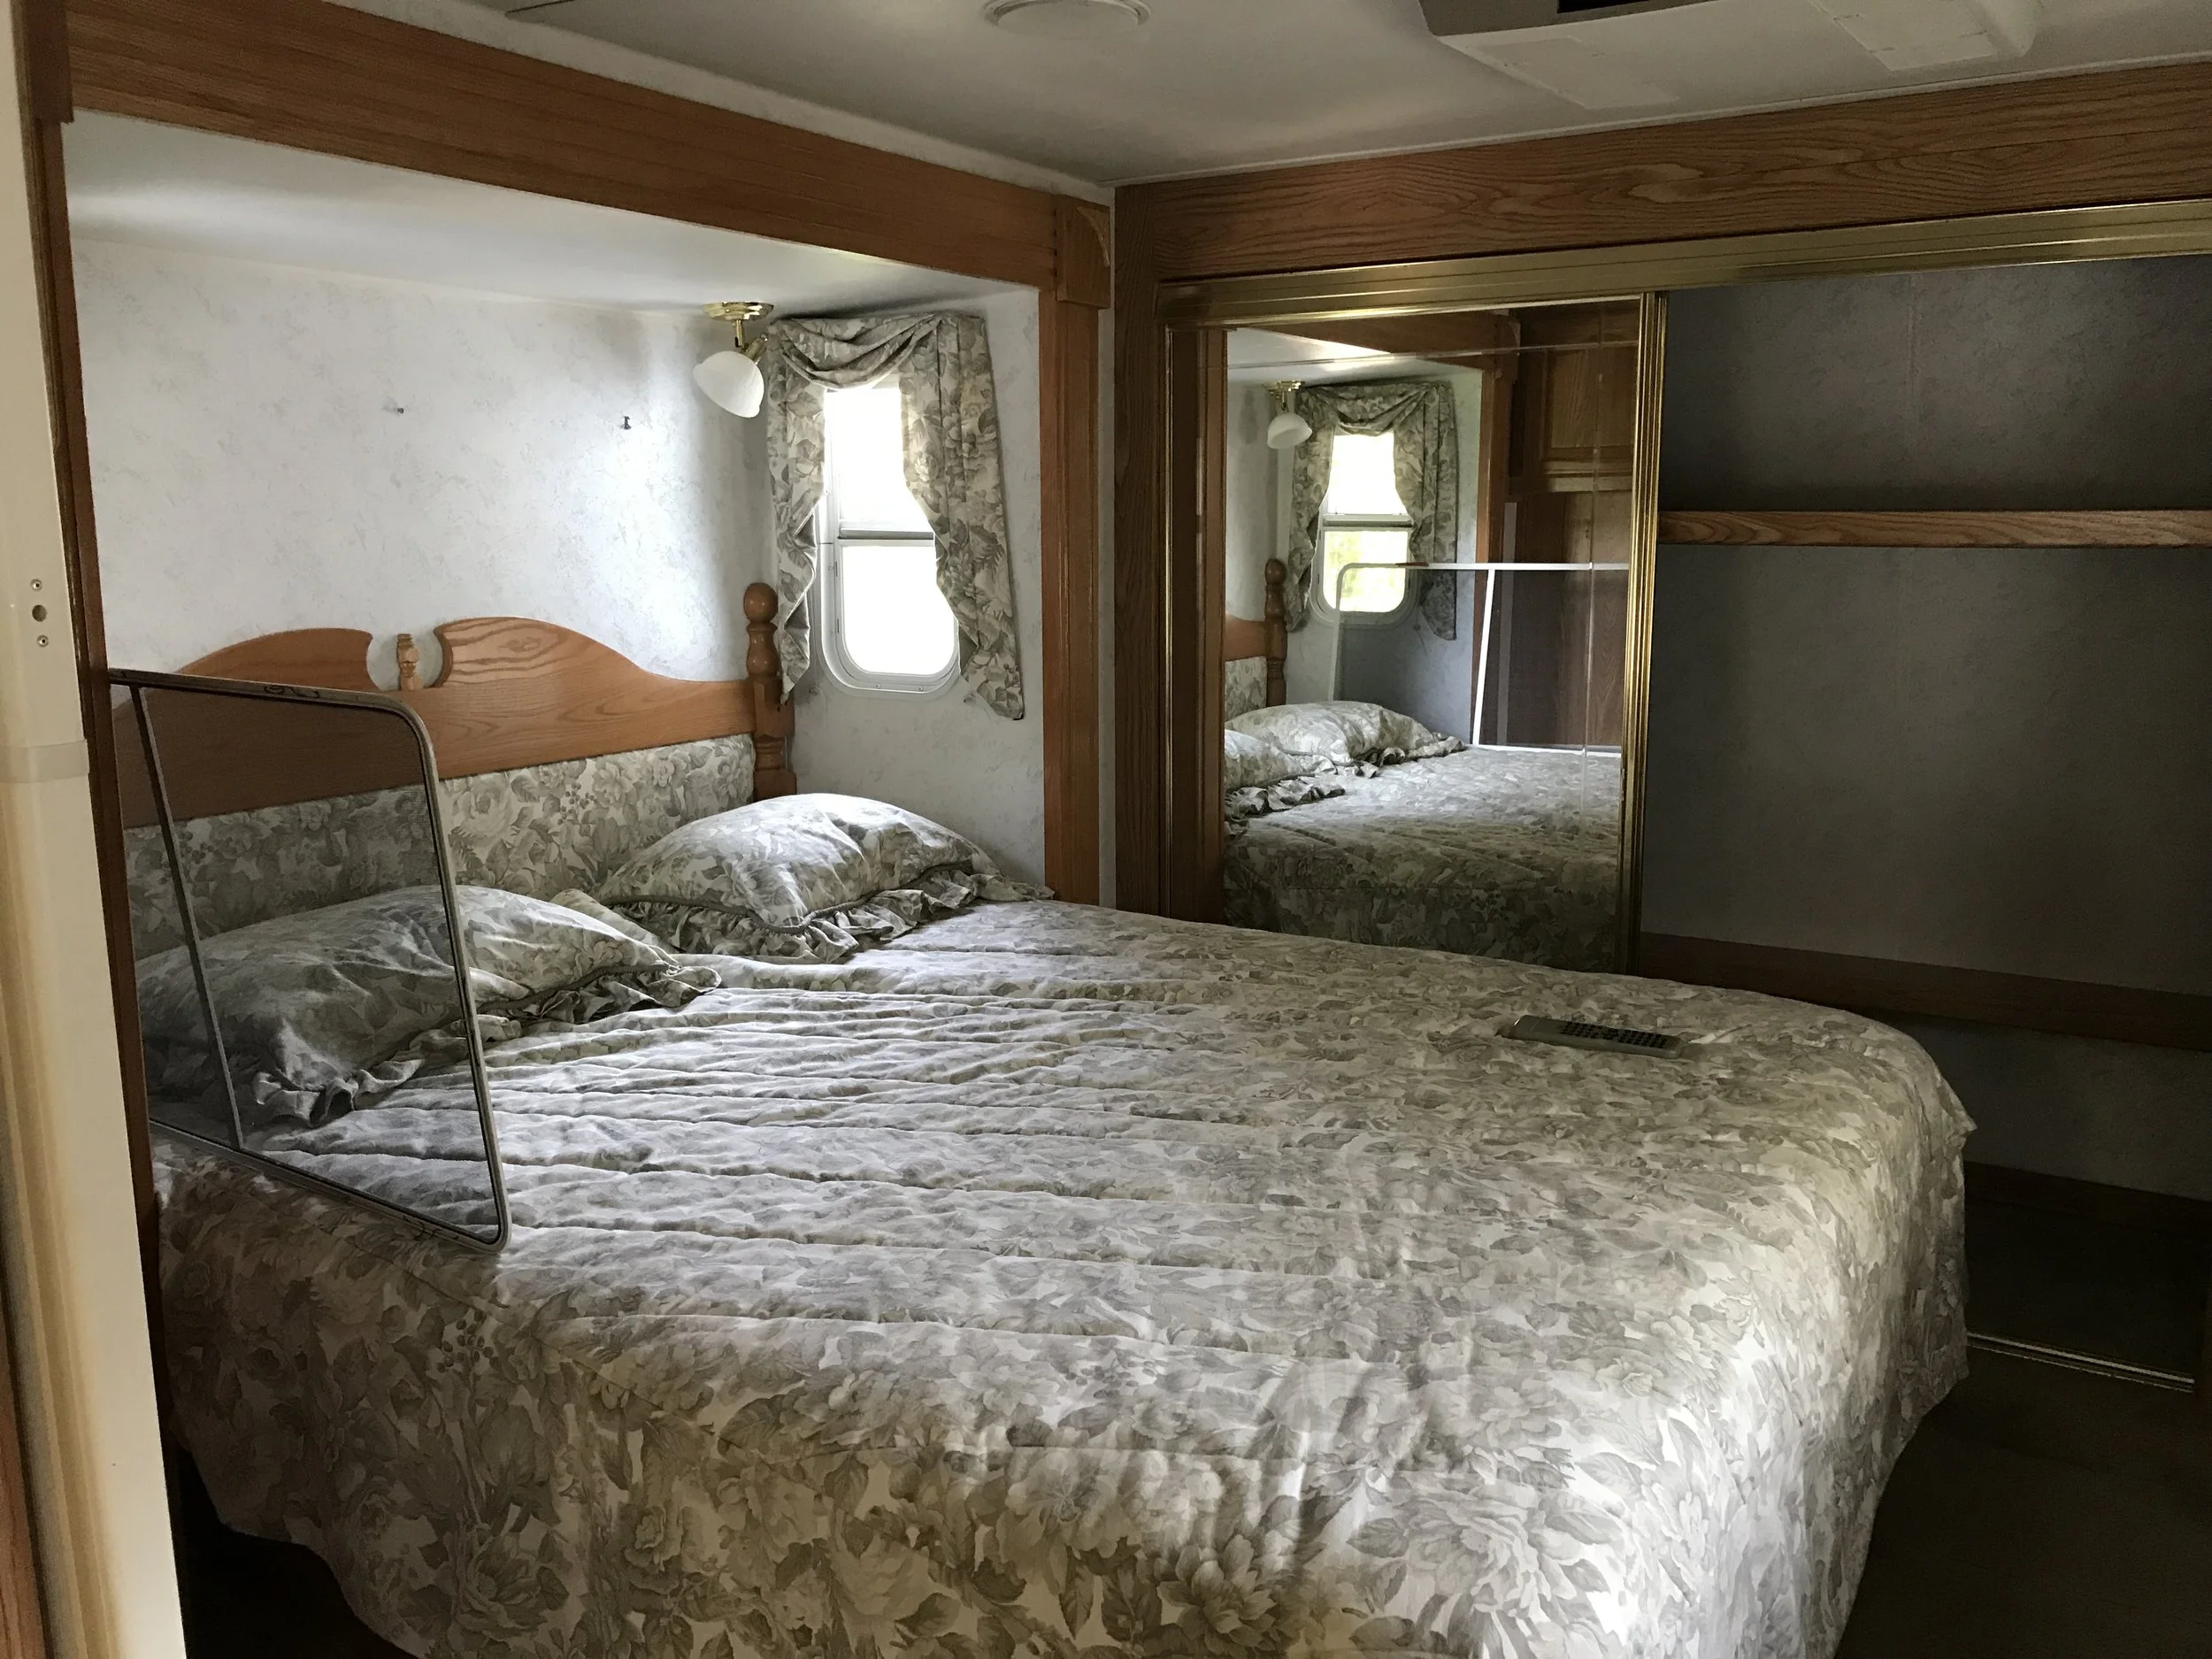
Next came the floors (we will talk about that more in a later post) and putting back together the cabinets! Once all the “mandatory” work was done, we were at a loss in what decor direction we wanted to go in. We definitely wanted to do something bold behind the bed. A bold wallpaper? Bribing my brother in law to build an intricate wood piece? Paint? So, we basically decided not to decide and just left it alone for a month or two until we felt confident in a direction.

First picture of many of my dad helping us figure this out as we go. There were a lot of classic Steve head shaking and sighs at this stage.
Finally, A plan:
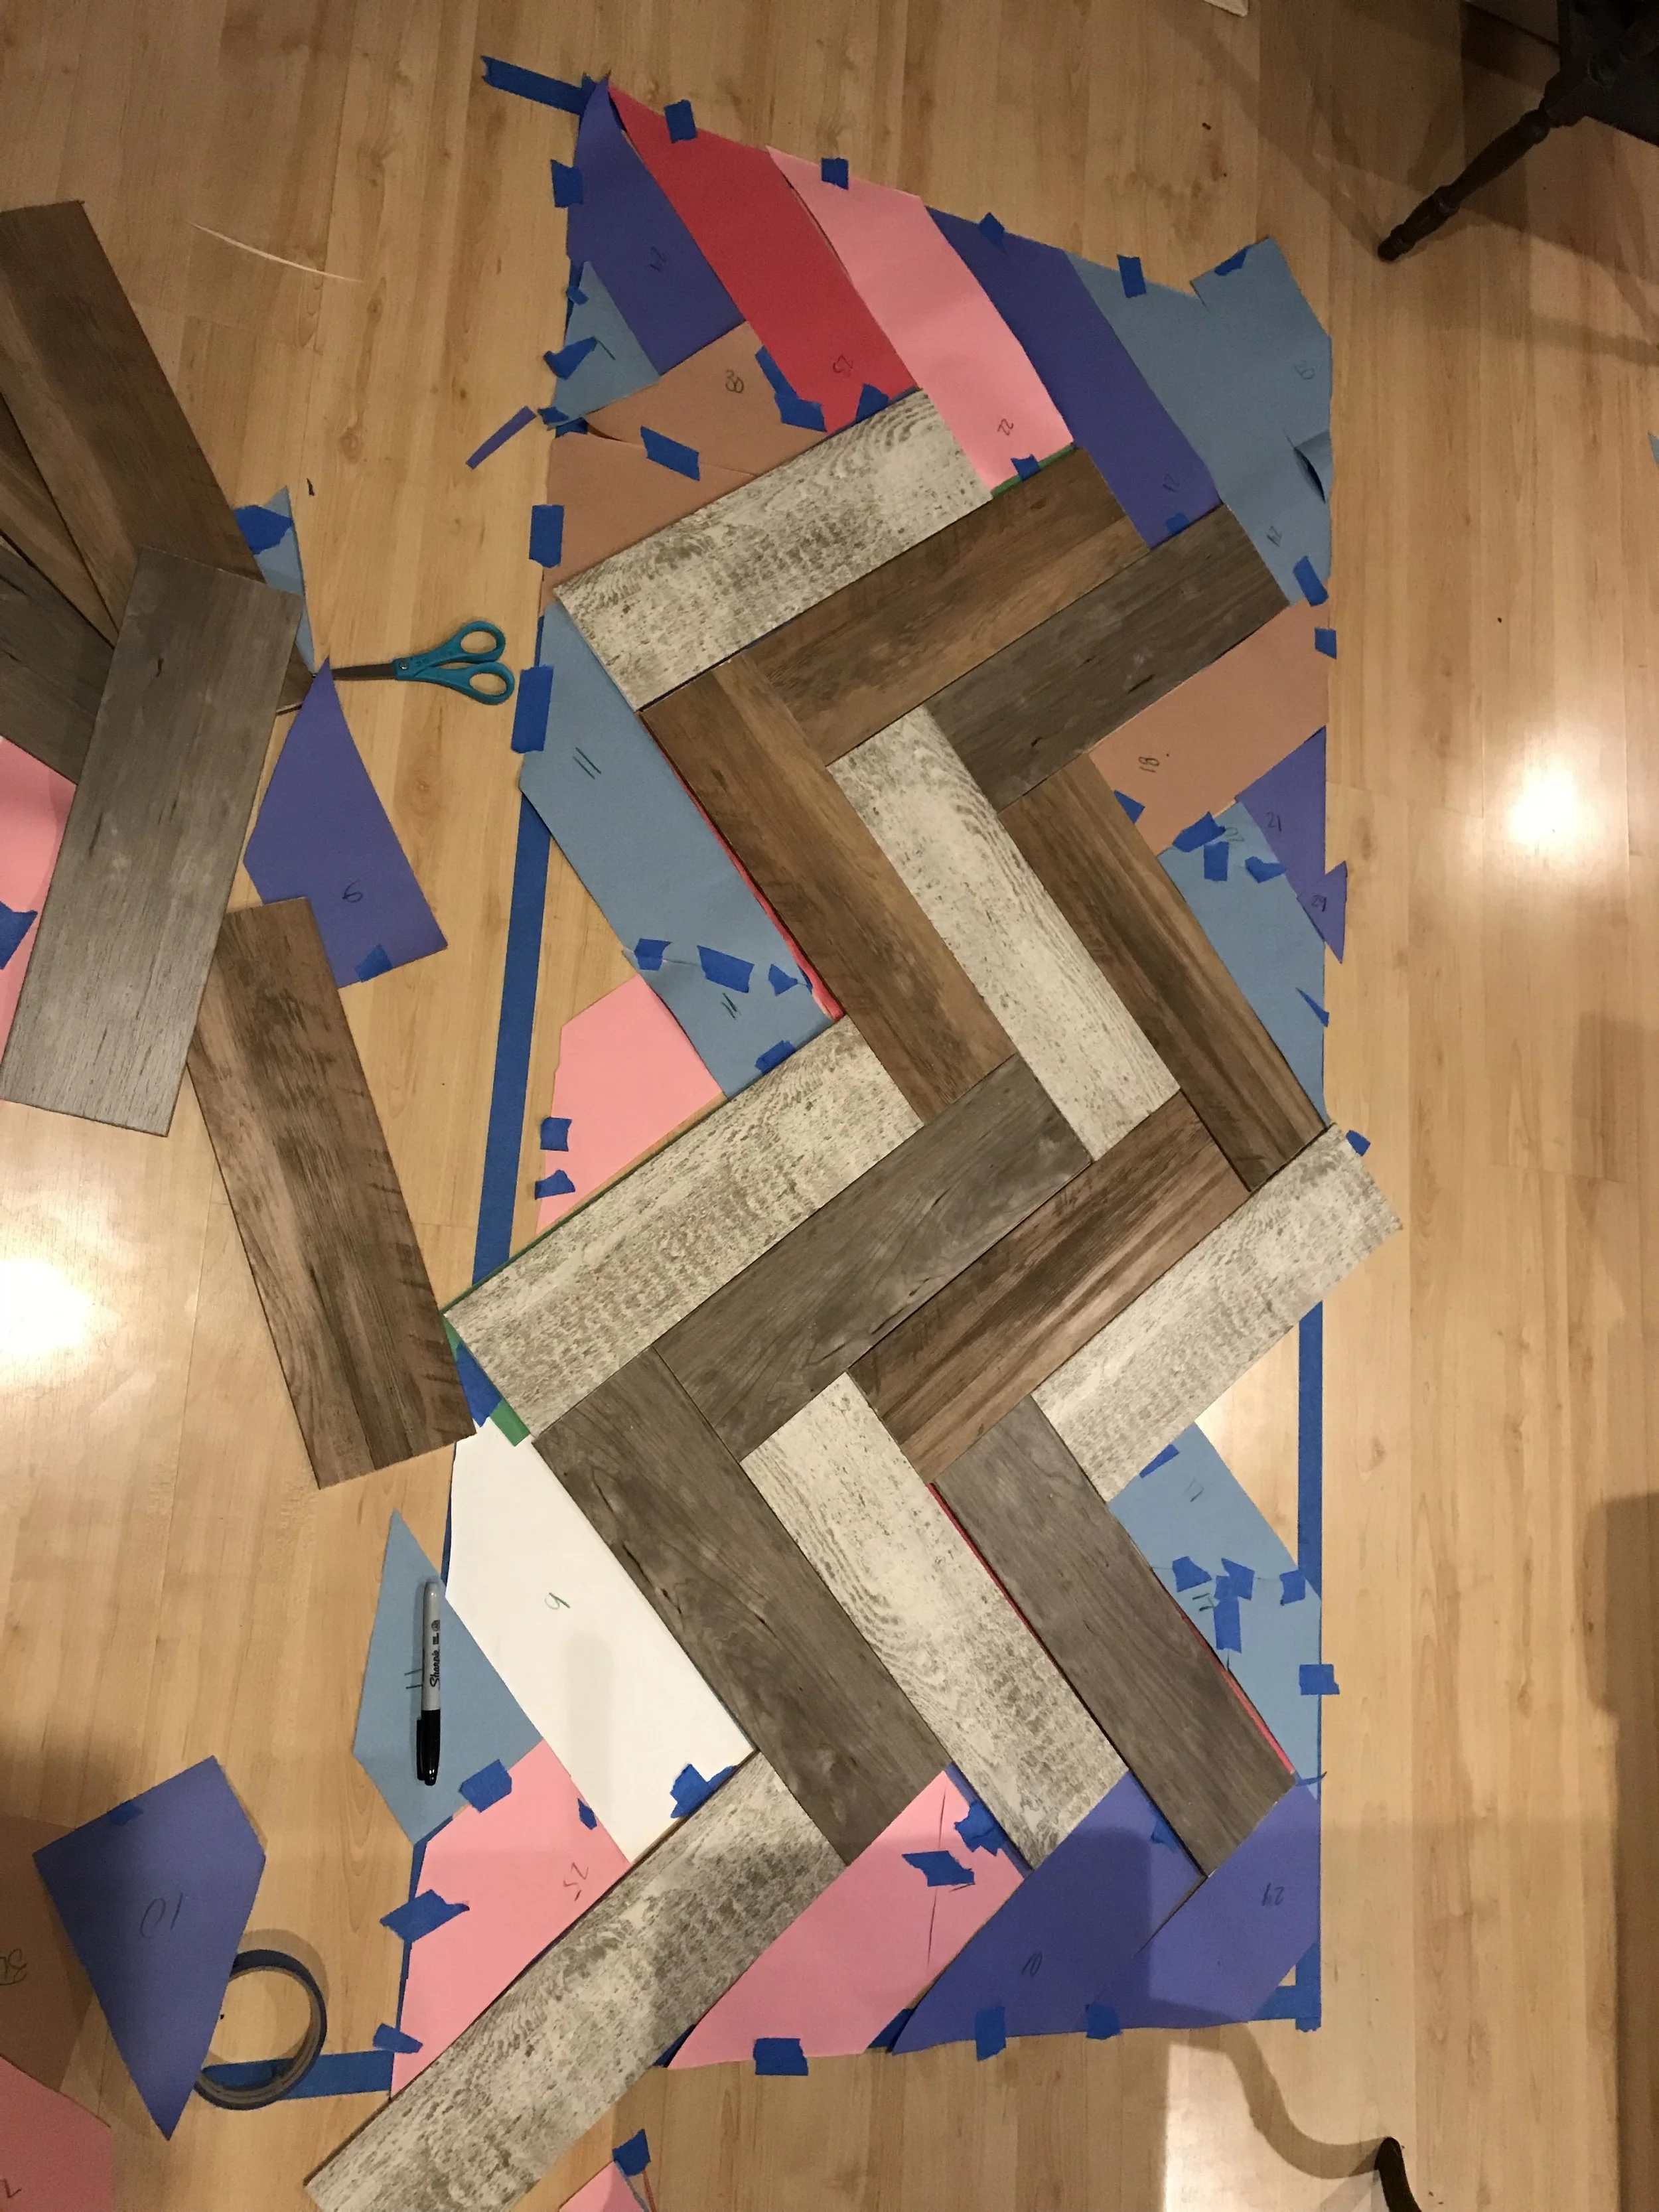
To get the perfect fit and layout, we spent the better part of one afternoon sitting on my parent's living room floor creating this masterpiece.
On trip #1840 to Lowes (if you have ever renovated something you know I’m not exaggerating), we found a new product— PVC faux wood planks. They met all our needs: super light, seemed easy enough that I could figure it out on my own, and bold enough to make a statement in our otherwise bland room. We love the results! The boards are held up with 3M stickies (we did buy more than the package came with) and was done in only about 2 full afternoons of work!
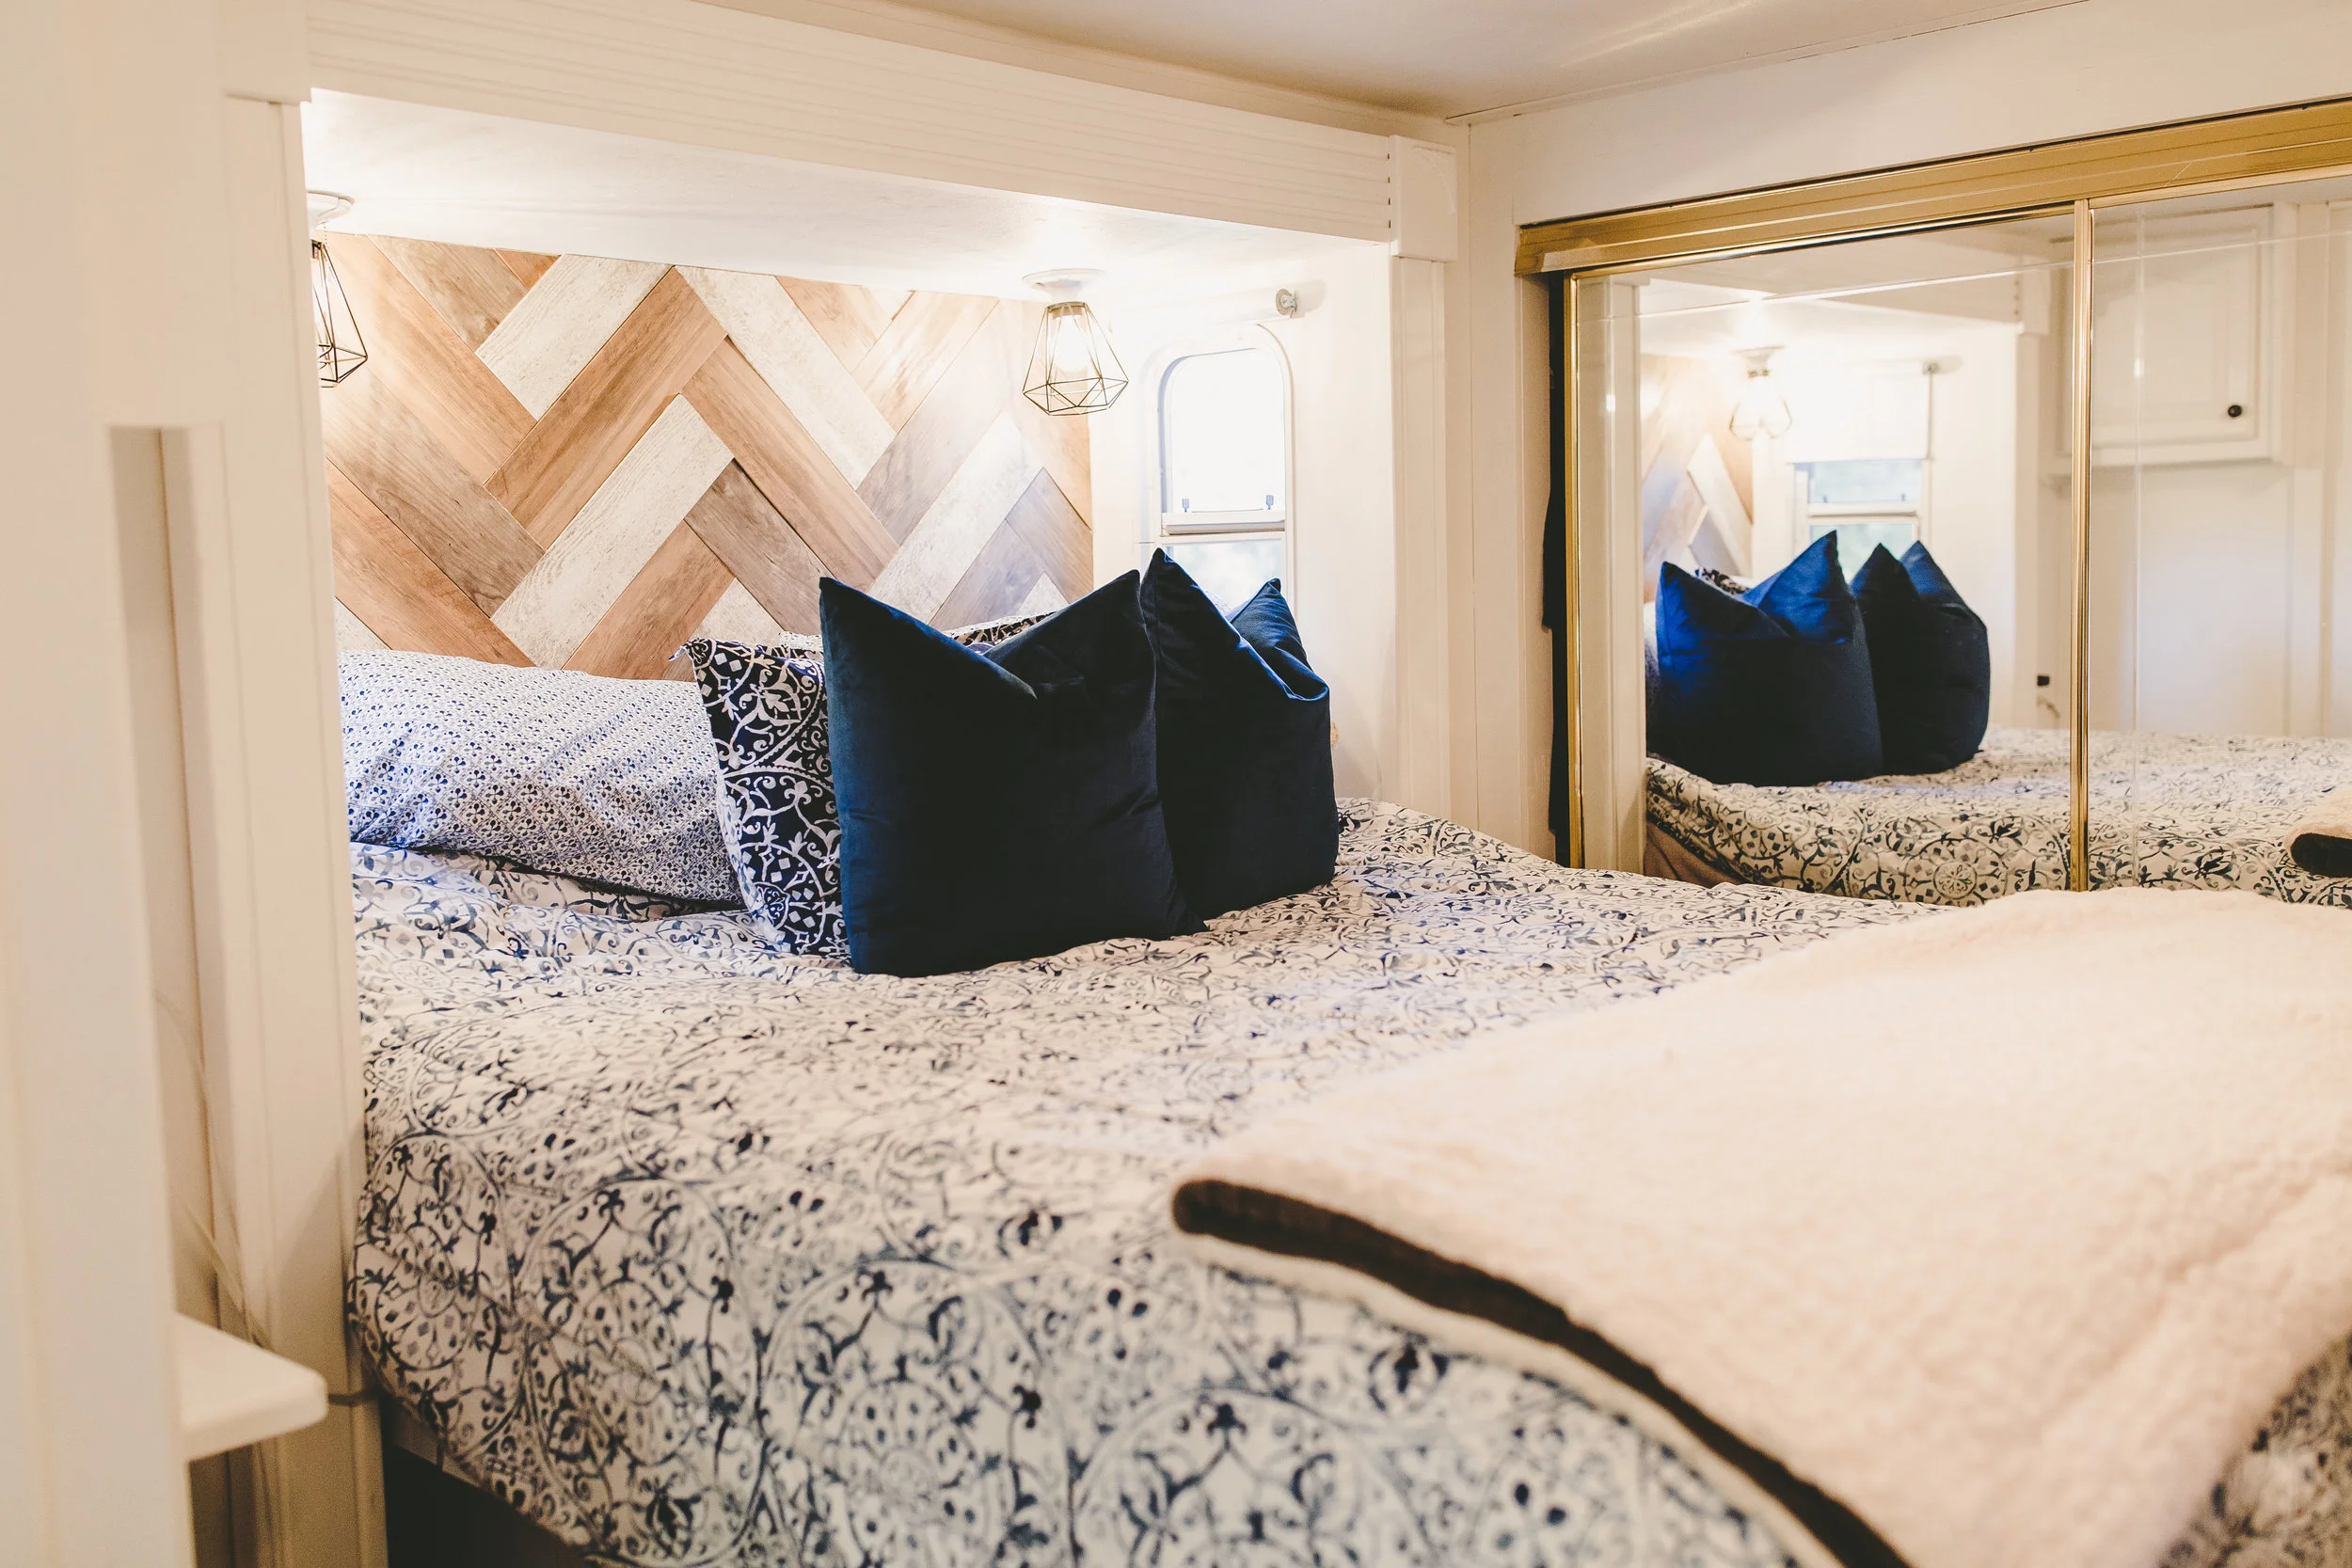
The light fixtures were the final piece to bring the space together. If you have been following our journey on instagram (@journeyonjacksons), you know it’s been a process! We were swooning over all the geometric light fixtures but couldn’t figure out how to make it work with the RV electrical panels. Thanks to the amazing community of RV-ers on social media we learned you could use any fixture with 12v light bulbs. Game. Changer. We hoped on Amazon and grabbed these as fast as we could. (And in the process traded our brother in law some dog sitting for electrical help. Thanks Andy!)
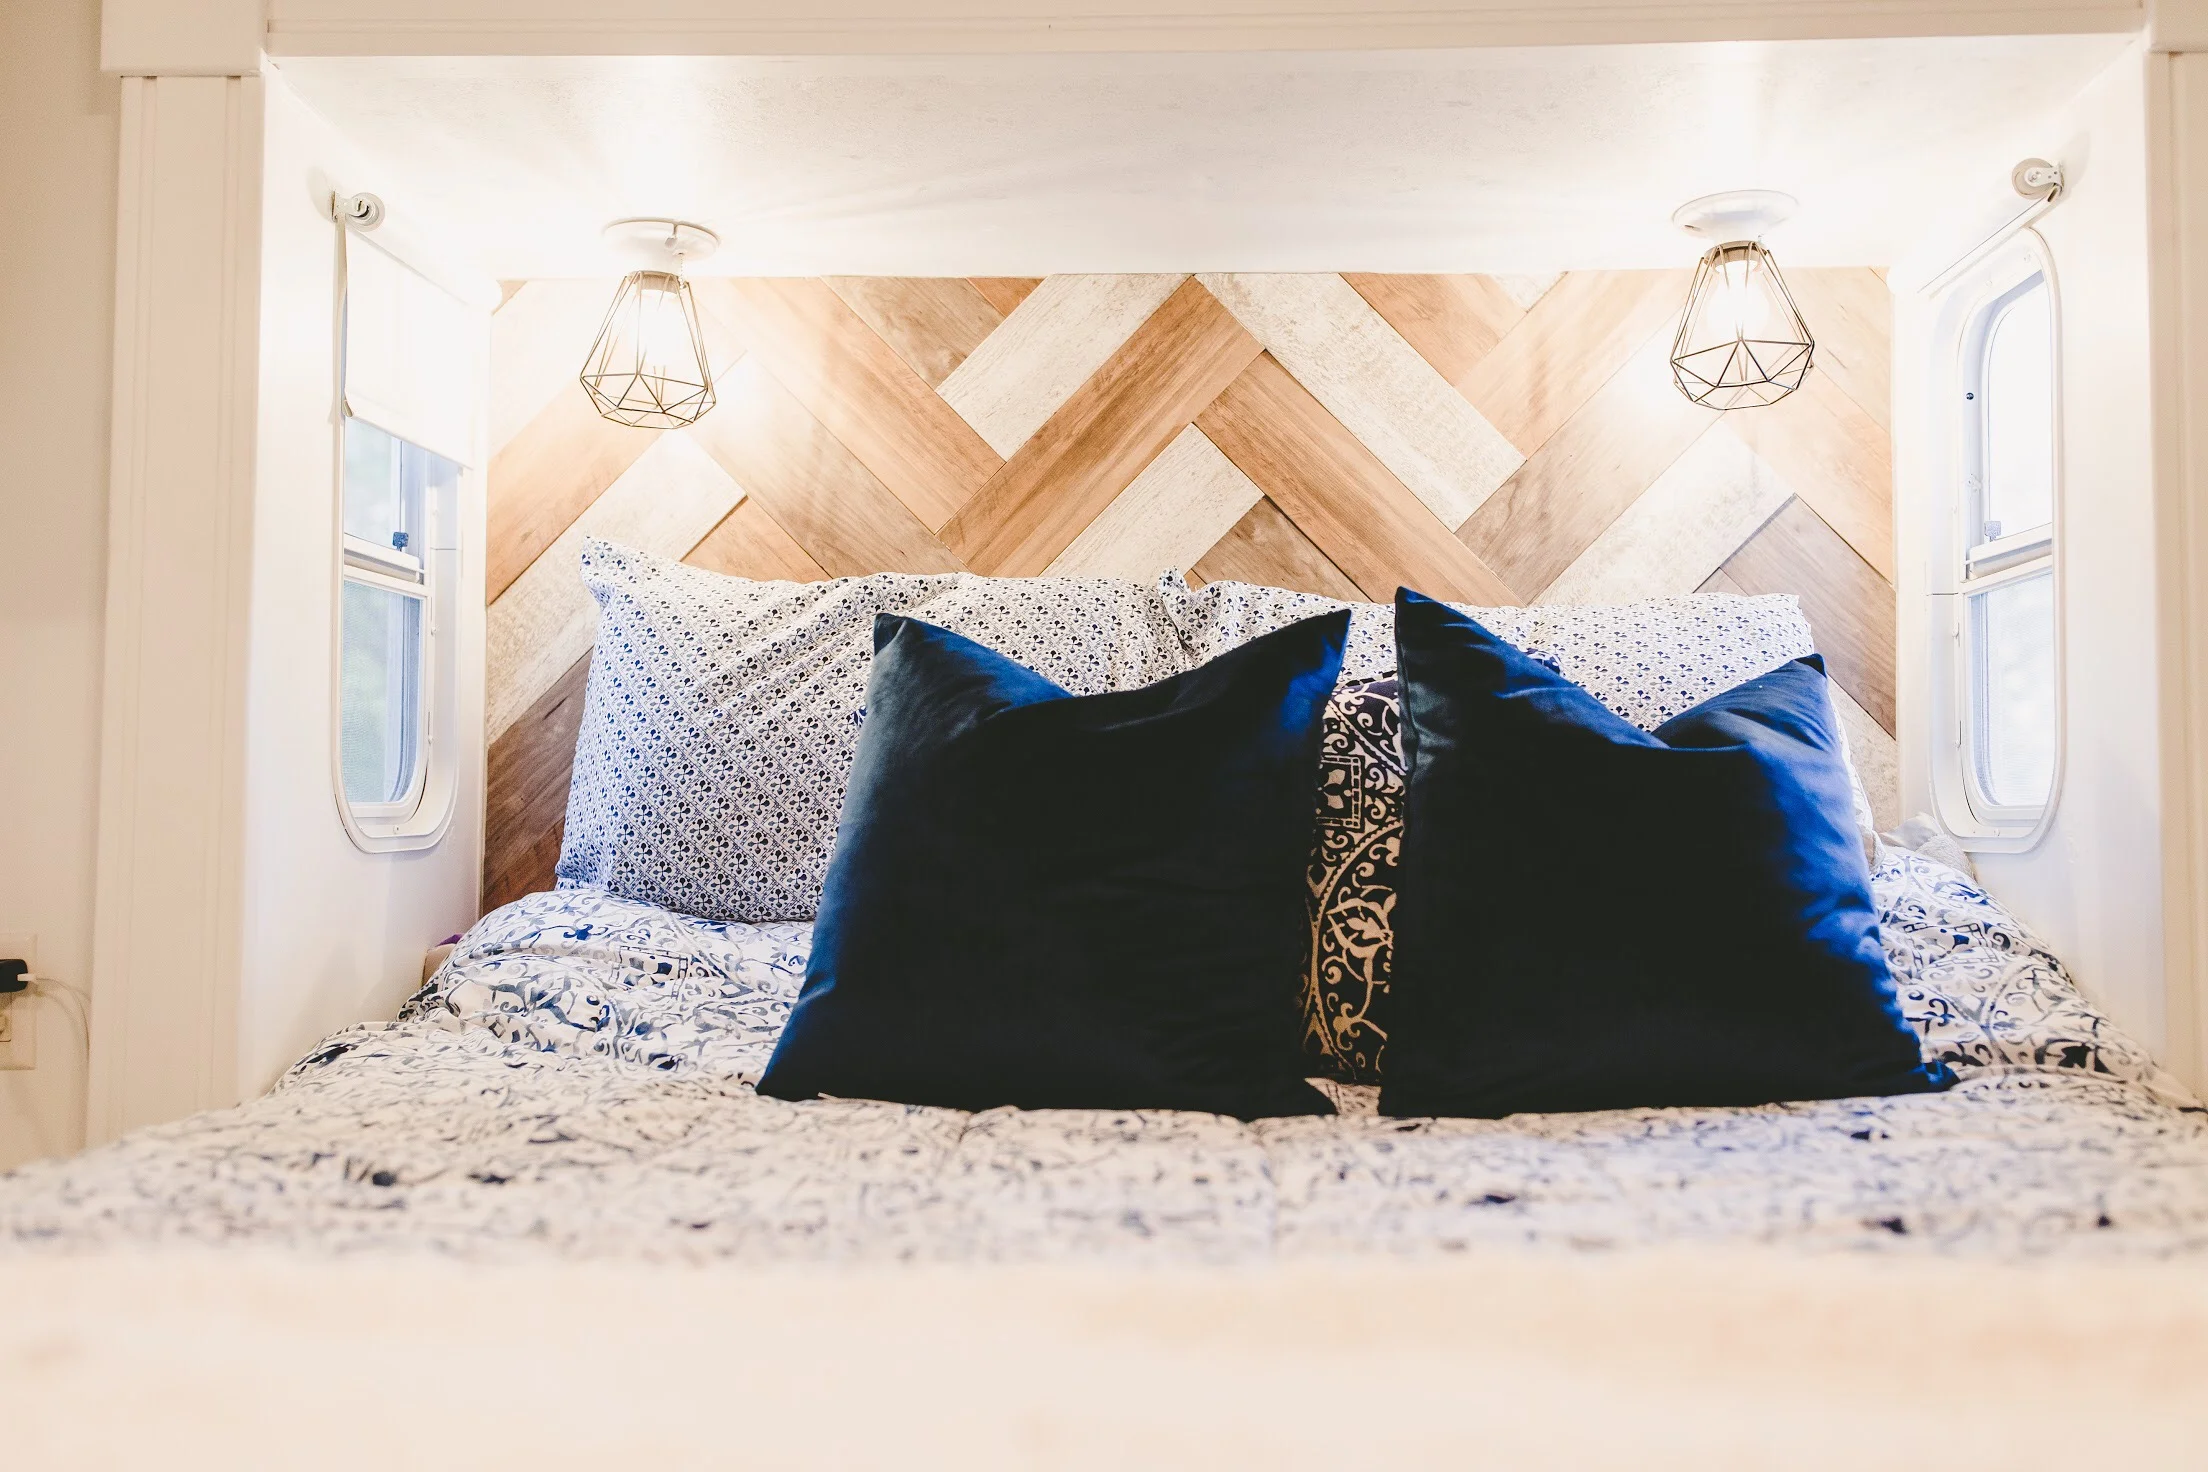
We found the light fixtures and bases at Lowe’s and the bulbs on Amazon.
Well, that’s a wrap on the bedroom! Thanks for hanging with us through our first renovation post!
links to products we used:
Wall planks:
Metal light fixtures: https://m.lowes.com/pd/Portfolio-6-in-H-6-in-W-Bronze-Wire-Industrial-Geometric-Vanity-Light-Shade/1000220483
Light bulbs:
https://www.amazon.com/dp/B077STLKMN?ref=yo_pop_ma_swf&th=1&psc=1
P.S. All the after photos you're seeing were shot by Hannah Arnzen Photography. If you're in the MO area and need photos done, she's your girl.